
Tips for photographing whales, whale sharks and other marine megafauna
FLASH OR NO FLASH?
When it comes to shooting whales and other marine megafauna, the question I get asked most often is ‘Should I use strobes?’. You never know what will show up on a dive so (if it is allowed) I always carry strobes with me. However, for truly enormous life forms, strobes tend to be counter productive. To appreciate why, its important to understand what strobes actually do.
It’s a popular misconception that strobes are there to brighten your images. While this may be partially true, if there is enough ambient light, the idea is to set your exposure so that the subject and background are bright enough without the need for strobes.
Strobes serve two purposes. Firstly, they throw light into the shadowy recesses so that the image has more detail. Secondly and more importantly for underwater photographers, they replace the wavelengths of red light that are absorbed by the water as you descend. The deeper you go, the bluer everything looks. Strobe light brings back the red tones in the visible spectrum, adding vibrancy and warmth to images that would otherwise be reduced to shades of blue or grey.
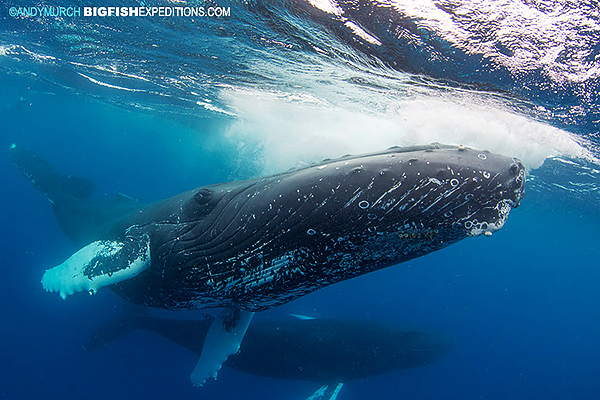
Consequently, strobes are invaluable in most underwater situations but when it comes to massive subjects, they fall short (literally). Even the most powerful strobes have an effective range of around two meters / six feet. Beyond this they may help to add a little contrast but the reds begin to taper off. For example, if you try to light a humpback whale, you’ll end up with a brownish grey area near the strobes (the true color of a humpback when seen at the surface) but the rest of the animal will be completely blue – a distracting result at best.
I suggest that you bring your strobes just in case a smaller photo subject swims by but switch them off while you’re photographing giants.
RECTILINEAR WIDE ANGLE LENSES OR FISHEYES?
Forget anything you’ve read in the past about the the eye being equivalent to a 35mm lens on a full frame camera – it isn’t. The human eye has an equivalent focal length of around 43mm. Lets skip the lengthy explanations about the ‘cone of visual attention’. Just trust me.
Camera lenses shorter than 43mm are able to see a wider field of view than we can. Some ultra short wide angle lenses have a whopping 180 degrees of coverage. That’s great for big subjects but increasing the angle of view comes at a price.
Really wide angle lenses have a convex front element that drastically distorts the image. These are called fisheye lenses and the effect is called ‘barrel distortion. The distortion increases the closer you get to the subject. Fisheye lenses have the widest angle of coverage of any lens on the market but the results can look odd. The portion of the subject that is framed in the centre of the image will look huge. Whereas, the parts of the subject that are framed near the edges of the image will look relatively tiny. Any straight lines in the image will also look bowed unless they are in the exact centre of the frame.
Rectilinear wide angle lenses do not distort the image in the same way but the corners of the frame may still look protracted and/or soft.
How does this affect marine megafauna photography? Well, you may find that the whale shark swimming past you looks ridiculous when photographed with a fisheye lens. Then again, if you switch to a rectilinear wide angle, your whaleshark won’t look so much like a zeppelin but you run a much higher risk of cutting off the edges off its extremities. And we all agree that cutting off shark fins is bad 😉
Whatever lens you use, it’s a good idea to add some distance between you and a large subject. This will increase your chances of getting the entire animal in the frame and reduce the effects of barrel distortion. You can always crop the image later.
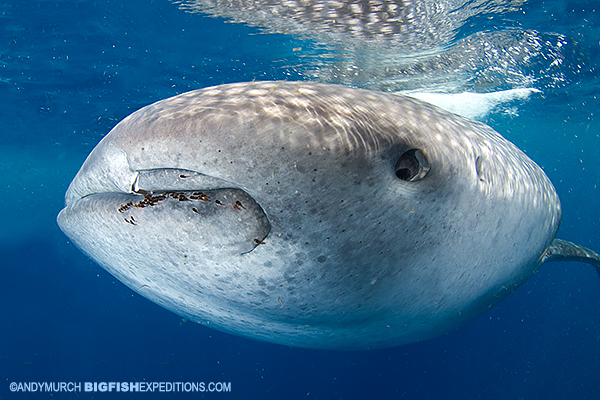
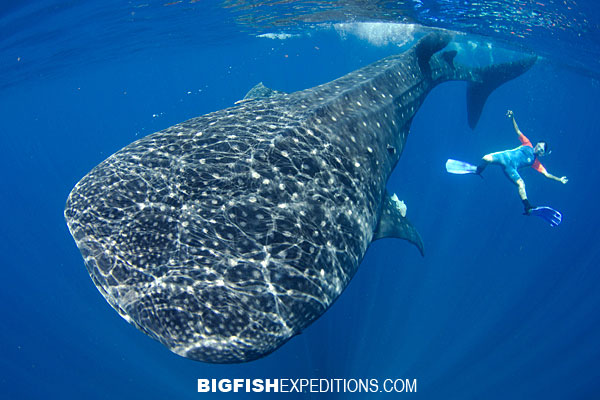
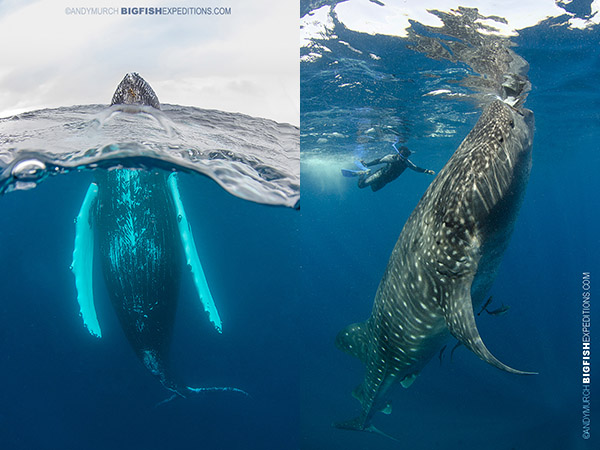
The top image shows a whale shark with an enormous mouth that tapers into a tiny tail. Whale sharks are bigger at the front but fairly cylindrical and their tails are enormous. This time, the composition works because the big mouth looks dramatic. In the bottom image, the barrel distortion is not so pleasing!
ADD PERSPECTIVE AND/OR FILL THE FRAME
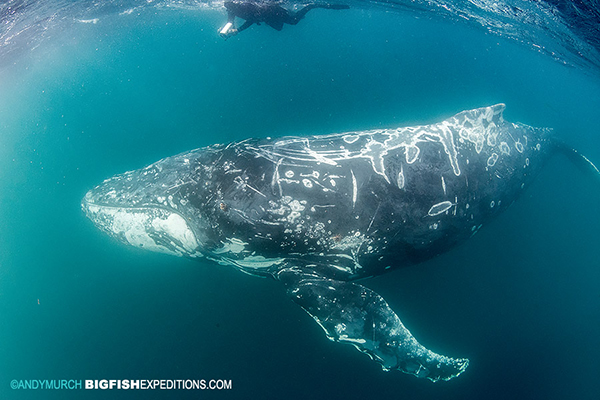
No mater how big an animal really is, if you frame it in the middle of the image with lots of water around it, it will look smaller than life size; an effect that you probably don’t want.
Conceivably, you may be able to compose a spectacular image of a whale swimming over a gorgeous reef with dramatic sun rays slicing through the water column and the distant whale silhouetted in front of the sun splash. Sounds dreamy but the ocean rarely provides visibility that would make a shot like that possible. So, chances are, you’re going for a more traditional, dramatic shot of a big whale looking at the camera.
To make the whale look massive, try to fill the frame with it but make sure there is some water left between the head of the whale and the edge of the image. This is because the human brain finds it more pleasing to see an animal moving into the frame. If you position its nose too close to the edge, it will look as though it’s swimming away.
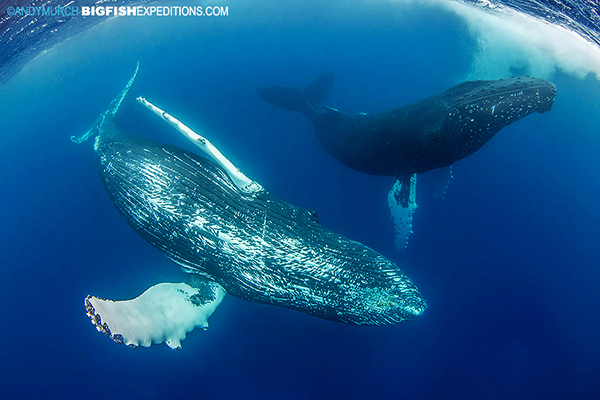
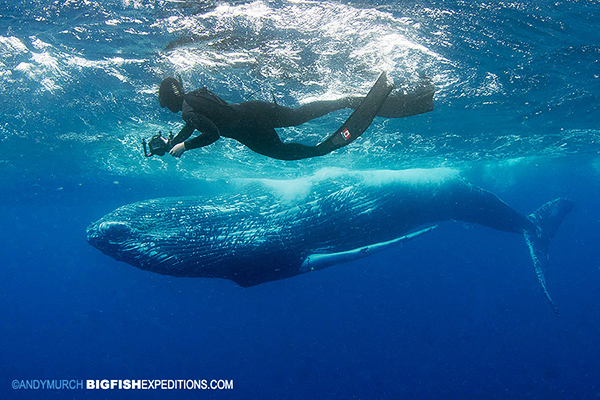
Another technique you can use to make the subject look huge is to add a human. If you can’t afford to bring a model (and most of us can’t) then try to make a deal with another diver on the boat. Either find another shooter and pose for each other or better still, ask someone without a camera if they’ll pose for you and then share your images with them. Don’t be too pushy – everyone is on vacation but I generally find someone that is keen to get in the image.
Once you’ve found a cooperative model, ask them to position themselves behind the subject. This way the subject will look even larger than life. Conversely, if the model is positioned in the foreground, they will make the subject look smaller than it really is; as in the following image.
Often, marine megafauna dives are snorkeling encounters so your model needs to be able to duck dive down to the whale’s depth on a single breath. If they remain at the surface, not only will it be harder to get them in the shot, but the surface wave action will make it difficult to see them at all. If your model can’t dive (or if they’re just someone caught in the background of the image) then you will have to dive instead so that you can line them up with the animal. In this situation, you’ll have to get even deeper than the whale to position the surface model behind them. This means you’ll be shooting upwards towards the light so your subject will be in shadow. More about megafauna silhouettes in the next section.
Generally, it’s pleasing to see models looking streamlined. Better still if they are swimming in the same direction as the subject. But, you can sometimes make a bold statement by having a snorkeller in disarray as if they’ve been bowled over by a behemoth!
SHOOTING MARINE MEGAFAUNA SILHOUETTES
Encounters with massive animals tend to be fleeting but if time is on your side, you may want to try shooting some silhouettes. Very large animals are ideal for this type of photography because they are relatively easy to line up with the sun.
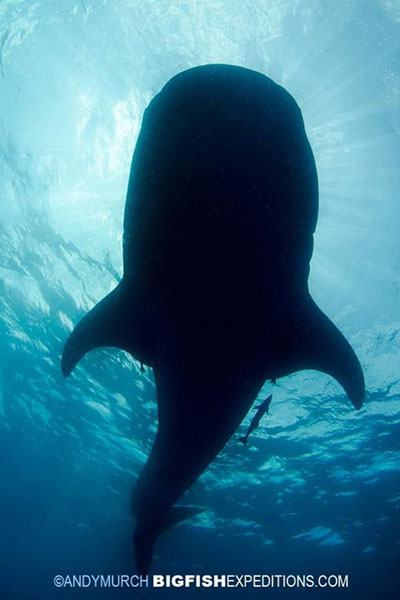
You have two choices when shooting silhouettes underwater. You can position the animal directly infront of the sun so that it blocks the harsh sunsplash, or you can stop down your exposure so that the sun splash is visible and throws shards of light in every direction. The latter can look amazing when done well but it is an extremely challenging technique because your exposure settings generally have to be so low – to avoid overexposing the sun – that the subject is completely lost in the shadows.
Even if you’re blocking the sun with the subject – as seen below – you will still need to stop down your F-stop so that your lens lets in very little light. This mean you must shoot in manual mode because other camera modes will average the available light and completely blow out the background.
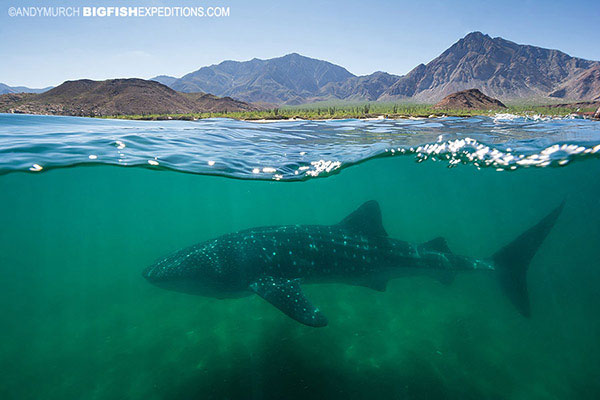
GO FOR THE SPLIT
If your whale or whale shark is close enough to the surface and moving predictably, you may have a chance at nailing some splits. Remember that the key is to expose the terrestrial world correctly while spot focusing on the underwater subject. For split frame images to be successful, you need an interesting topdide view as well as a well composed underwater subject. Coastlines, boats and sunsets or interesting cloud formations will all work.
Read more about split frame photography in this handy tutorial: Split Frame Photography
TRY CAPTURING BEHAVIORS
Once you’ve got your first ‘proof of life’ images, its time to raise the bar. This may mean just getting closer so that your images have more detail or you can go for gold and try to capture interesting behaviors but lets face it, capturing anything other than animals swimming is no easy task. Humpies and whalesharks are intrinsically shy animals that are never seen mating or birthing. So if you do run into this kind of activity, shoot like a photographer possessed because even if your settings are off, the images you capture will be very well received by scientists and the general public alike.
Some interesting behaviors that you may have a chance to witness include humpbacks spy-hopping and whale sharks ‘bottling’. These behaviors both involve the animals floating vertically in the water.
For the whales, this is a chance for them to expose their sensitive chin pores to the air where they can ‘smell’ or ‘taste’ the environment. They might do this to find out who else is in the area or perhaps to judge the position of large masses of krill. Whale sharks bob at the surface in a similar way but its likely they are simply staying in a spot where the food is particularly thick or perhaps hanging vertically to release air bubbles that have lodged in their stomach cavities after long periods of surface feeding.
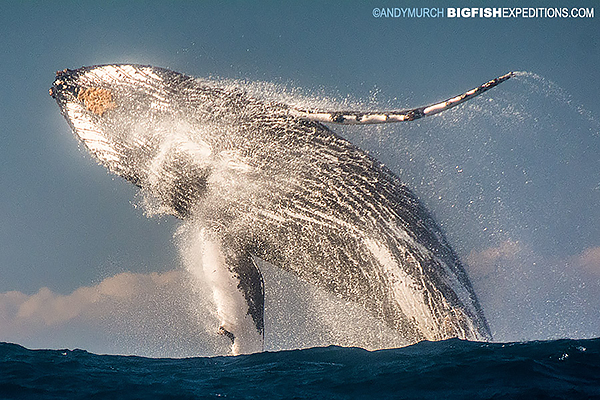
LASTLY, BE READY FOR THE BREACH
Humpback whales love to breach – leap out of the water. They do this to make loud noises that other whales can hear and to rid themselves of parasites and maybe sometimes just for fun.
If you want to get good breach shots, you have to pick your destination carefully. Some well know humpback hotspots like the Silver Banks are great for watching humpbacks underwater but there are surprisingly few breaches. At other places like on the South African Sardine Run, it seems as though the humpbacks never tire of breaching. Its not uncommon to sit in the boat and watch a pair of humpbacks breach fifty or sixty times in the exact same spot. You could not ask for a better opportunity!
To nail the shot, you need an experienced boat captain that can position the boat on the sunny side of the breaching whales. You also need the right lens. A good captain will get you close enough to the whales that you don’t need a long telephoto. A mid length zoom that stretches from wide angle to around 200mm at the narrow end should be perfect.
You’ll need to use a fast shutter speed – perhaps around 1000th of a second or faster – to capture the breach and freeze all of the water droplets that are thrown off as the animal emerges.
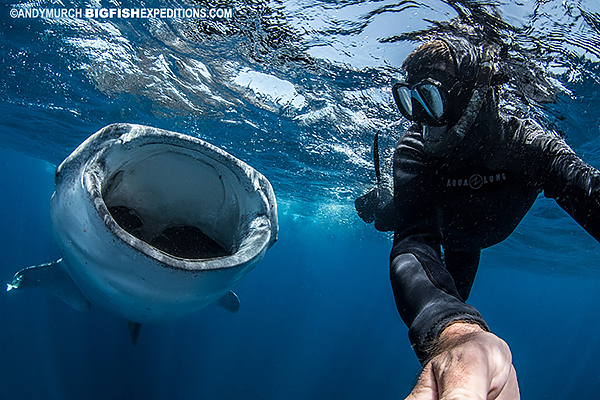
MEGA SELFIES
If the opportunity arises, give it a try!
Andy Murch is a fanatical big animal photographer. His images and shark stories have appeared in hundreds of books and magazines around the world from titles as varied as National Geographic, Scuba Diving, FHM, Digital Photography Magazine and the Journal of Zoology.
Andy is the Creator of the ever expanding Shark and Ray Field Guide on Elasmodiver.com
