
Call them what you want, this is the ultimate guide to shooting better split frame shark images.
WHERE TO TAKE AMAZING SPLIT FRAME SHARK IMAGES
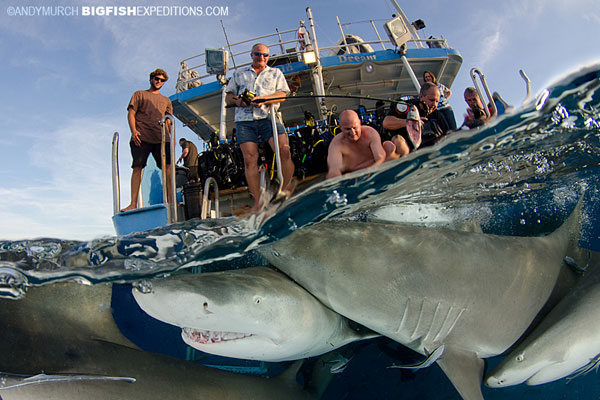
When it comes to sharks, the process of shooting close quarter, over/under images has a lot more to do with logistics than F-stops. The first hurdle is to find an accommodating aggregation of sharks that are bold enough to approach your camera without getting so agitated that the encounter becomes too dangerous for you or the sharks.
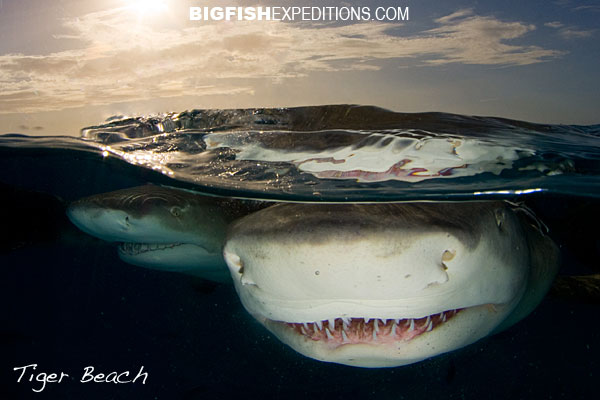
For those that have not had the pleasure of diving this infamous spot, Tiger Beach is a shallow sand bank (with no land in sight) reachable from Grand Bahama Island or from Florida by liveaboard.
TB offers virtually guaranteed encounters with large schools of impressively sized lemon sharks and a handful of resident tigers. When the light gets too low to continue shooting underwater, many divers drag themselves back on deck and hang from the swim step in an attempt to capture shots of the sharks breaching on their cameras.
ENTER THE SHARK WRANGLER
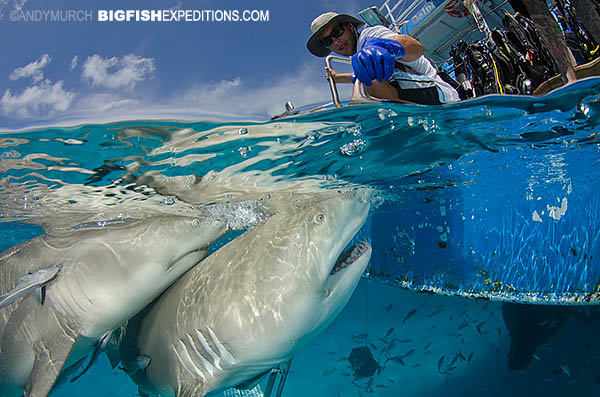
Even when surrounded by a score of large, excited sharks, it is not easy to get in exactly the right position to nail a perfect split-frame head shot. To optimize the chances of a shark swimming directly at your dome port you need a bait wrangler.
The wrangler takes a fishing pole, hand line or simply holds a scrap of fish a short distance from the swim step. He/she then leads the shark towards your location. Once the shark is a foot or two away from your dome port, the wrangler allows it to snap at the bait, whipping it out of the frame a split second before you trip the shutter.
It takes skill and experience to conduct this maneuver without either the shark snatching the morsel and swimming away, or the shark crashing into your camera or the boat – which is inexcusable.
 THE PROS AND CONS OF HAND CAMMING
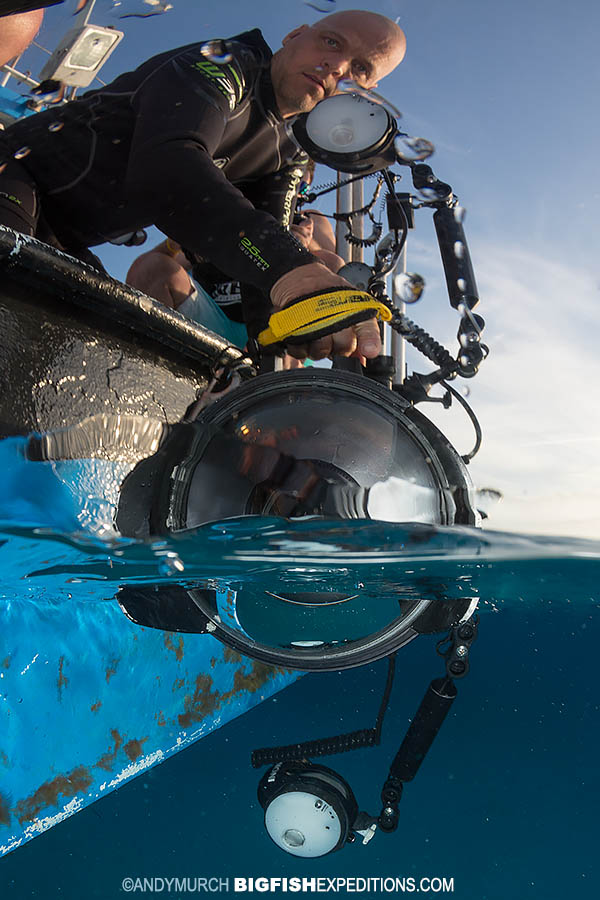
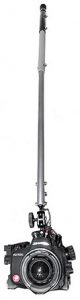
Dangling from a bobbing, freshly gritted swim step, while trying to hold a heavy camera housing at the perfect height for split frame images, can be a painful and frustrating experience. Consequently, some well prepared shooters bring a pole cam along which allows them to adopt a more comfortable stance and keeps all of their appendages out of harm’s way. Some fancy pole cam rigs even come with goggles that allow the photographer to see what the camera in pointing at.
I prefer to hand cam (which simply means holding your housing in one or both hands and dangling it in the water). There are a number of reasons for this:
Firstly, time is limited during the magic hour when these images are possible and I like the ability to quickly review my pics and to manipulate my camera and strobe controls in order to compensate as the light fades.
Secondly, you can use floats to keep your housing at the right height but they’re cumbersome and unreliable. When dangling from your right hand, your camera housing should hang in a natural vertical orientation with your finger resting on the trigger. In this position, your elbow works as a shock absorber; quickly responding to the up and down movement of the ship. It is difficult to get that same control with a pole cam.
Thirdly, it puts you close enough to wipe the sticky bubbles off of your dome with your free hand. Try doing that from 6ft away at the other end of a pole.
Lastly, when attempting these shots, there is the inevitable moment when a shark will make contact with your dome port. I have seen dome shades disintegrate on impact, acrylic domes scratched beyond the healing power of Novus #3 Scratch Remover and housings walloped so hard that they sprang open, resulting in an immediate and catastrophic flood. Holding onto the actual housing allows you to haul it out of danger faster than you would if it were dangling from a pole. There is no reason why you can’t react quickly with a pole cam too but I feel that hand camming shaves off a nanosecond or two when you really need it.
MORE ON CAMERA ORIENTATION
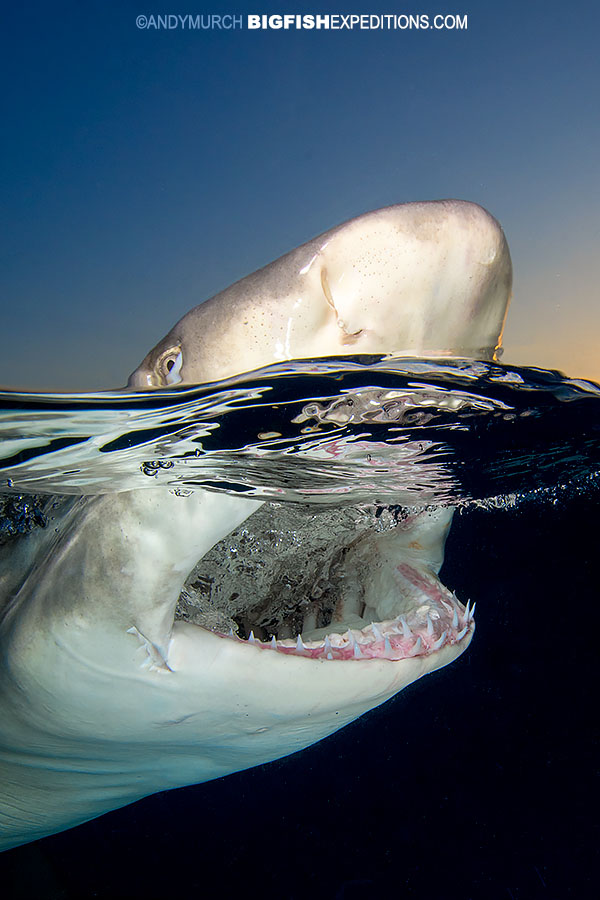
Once you’ve got your system set up its time to choose a camera orientation. I like to shoot verticals, partly because my housing is easier to dangle vertically, but also because I am looking for split frame compositions where the submerged subject is low in the frame and the skyline or topside subject is also worthy of attention.
Perhaps most importantly, a vertical orientation helps to keep the waterline in the frame. You may not always get it dead centre but you have more leeway if your frame is taller than longer. You can always crop to a landscape in post if you feel that the composition warrants it.
EXPOSURE VARIABLES
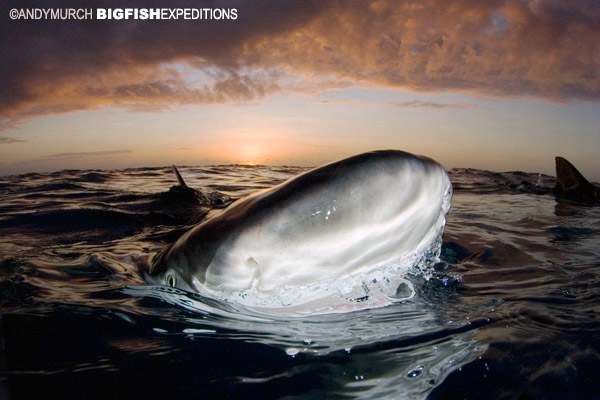
WORKING WITH AMBIENT LIGHT ABOVE AND BELOW THE WATER
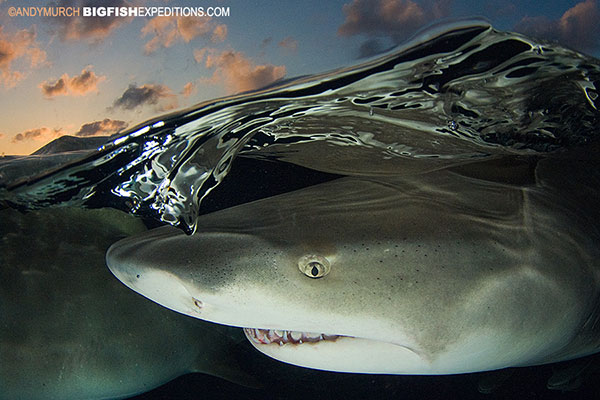
Assuming that the boat is actually swinging in the right direction to bring the sunset into the equation, expose the sunset first.
Depending on the ambient light that is left, you’ll either have darkish blue/green water or complete blackness below the surface. There isn’t much you can do about this. Obviously, you’re going to light the shark with your strobes but you can’t crank up the ISO to compensate for the dark water because it will blow out the sunset. Enjoy the sharp contrast this ultimately creates and move on.
USE A FAST SHUTTER SPEED
The lemon sharks at Tiger Beach generally come in slowly but they snap open their jaws at lightning speed when they’re lunging at the bait. Depending on the nature of the shots that you are after, your shutter speed could be anywhere between about 1/250th and 1/2000th. You can try shooting even faster but remember that you’re relying on your strobes which have a maximum sinc speed of 1/250th or sometimes 1/320th of a second. If you are using housed land strobes you can shoot much faster.
ROLL WITH THE FADING LIGHT
Don’t get lazy or lost in the moment. At sunset the light changes every minute. Keep reviewing your histogram and highlights and slowly dial up your ISO or open your aperture as the sun sinks lower below the horizon. At the same time, you also need to gradually lower your strobe power. This process actually gets easier as the sun gets lower and less intense. And, night split shots can be fun too.
MORE ON STROBES
Working with strobes within a few inches of a shark can be challenging. Forget about avoiding backscatter. Position your strobes close to your dome and point them inwards. If you don’t do this you’ll miss the shark’s nose as it brushes past your dome port resulting in a very annoying dark patch. Give TTL a try if you like, but be prepared to switch to manual strobe settings if the shark’s bellies and snouts are overexposing.
Time is not on your side, so rather than wasting it on trial and error strobe exposure, use your guide numbers (estimate a strobe distance of 6 inches from your subject) or find a whitish surface on the boat and fire off some test shots to set your initial strobe power. Chances are that you will end up working on the lowest settings you have and using your strongest strobe diffusers to lessen their output. If they’re still too bright, pull them backwards and outwards but keep your strobes pointed at a spot just in front of your dome.
If possible, try to position one strobe in air and one in water. If both your strobes are in one medium or the other, then you run the risk of the light reflecting off of the surface and only illuminating half of your subject.
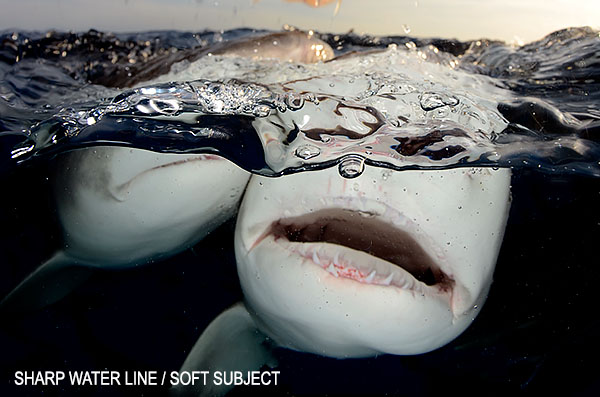

WATCH THAT WATER LINE!
If your lens has the amazingly short minimum focal distance of some fisheye lenses, then you run the risk of it focusing on the actual waterline where it is hitting the dome port. Some lenses won’t focus that close but mine does. To avoid this showstopper, set your spot focus on the bottom third of your frame where (most of the time) it will pick up on the shark and not the waterline.
AUTO OR MANUAL FOCUS?
Both have their merits. Autofocus is an easy option that can work very well in calm conditions but if you preset your focus to cover the range between a few inches and a few feet, then you should – in theory – get every shot in focus. You will also be able to shoot extremely quickly without any lag while your camera hunts for the subject. This is a key issue when you have a split second to nail a mouth open shot when the shark’s thrashing movements and choppy sea conditions are producing a lot of bubbles.
To preset your focus simply take a shot of an object a few inches in front of the camera while it is underwater and then physically switch your camera body to manual focus. All DSLRs have this function.
Note that if your subject gets even closer than expected, your preset focus may not be sharp where the shark is physically touching your dome port!
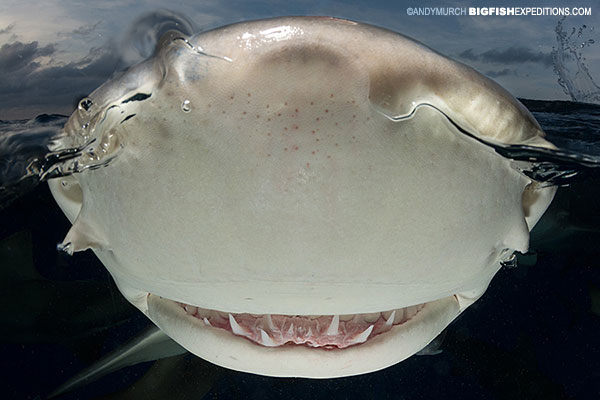
BE A GOOD AMBASSADOR FOR SHARKS
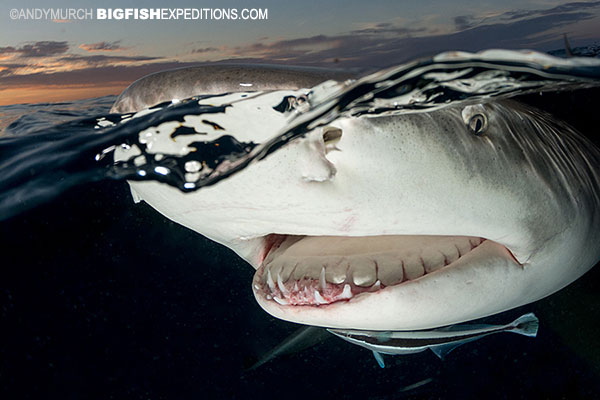
One last thought. Everybody wants to take home a dramatic looking mouth gape shot – me too. But when composing your images, spend a little time thinking about the message they will convey about sharks to others. Images bristling with teeth may be provocative but my favorite swim step images show sharks in a more inquisitive light. Vary the timing of your shots to capture the shark’s approach, not just it’s bite. You can also try holding you camera just above the water while the shark’s teeth are hidden below the surface. The results can be just as dramatic.
WHO SAYS YOU CAN’T PRACTICE SPLIT FRAME PHOTOGRAPHY AT HOME 🙂
Andy Murch is a fanatical big animal photographer. His images and shark stories have appeared in hundreds of books and magazines around the world from titles as varied as National Geographic, Scuba Diving, FHM, Digital Photography Magazine and the Journal of Zoology.
Andy is the Creator of the ever expanding Shark and Ray Field Guide on sharksandrays.com
