How to find and photograph nocturnal animals using spotlights and thermal imagers.
FINDING ANIMALS AT NIGHT
There are two tried and tested ways to find animals at night; spotlighting and using thermal imagers.
Spotlighting usually involves driving or walking along a trail with one or more powerful spotlights trained on the surrounding terrain. The idea is to pay attention to movement or the eye-shine of animals that come within range of the spotlight.
Thermal imaging essentially works the same way but rather than relying on light, the photographer either holds or wears a thermal imaging scope that picks up on the heat signature of nearby animals.
SPOTLIGHTING
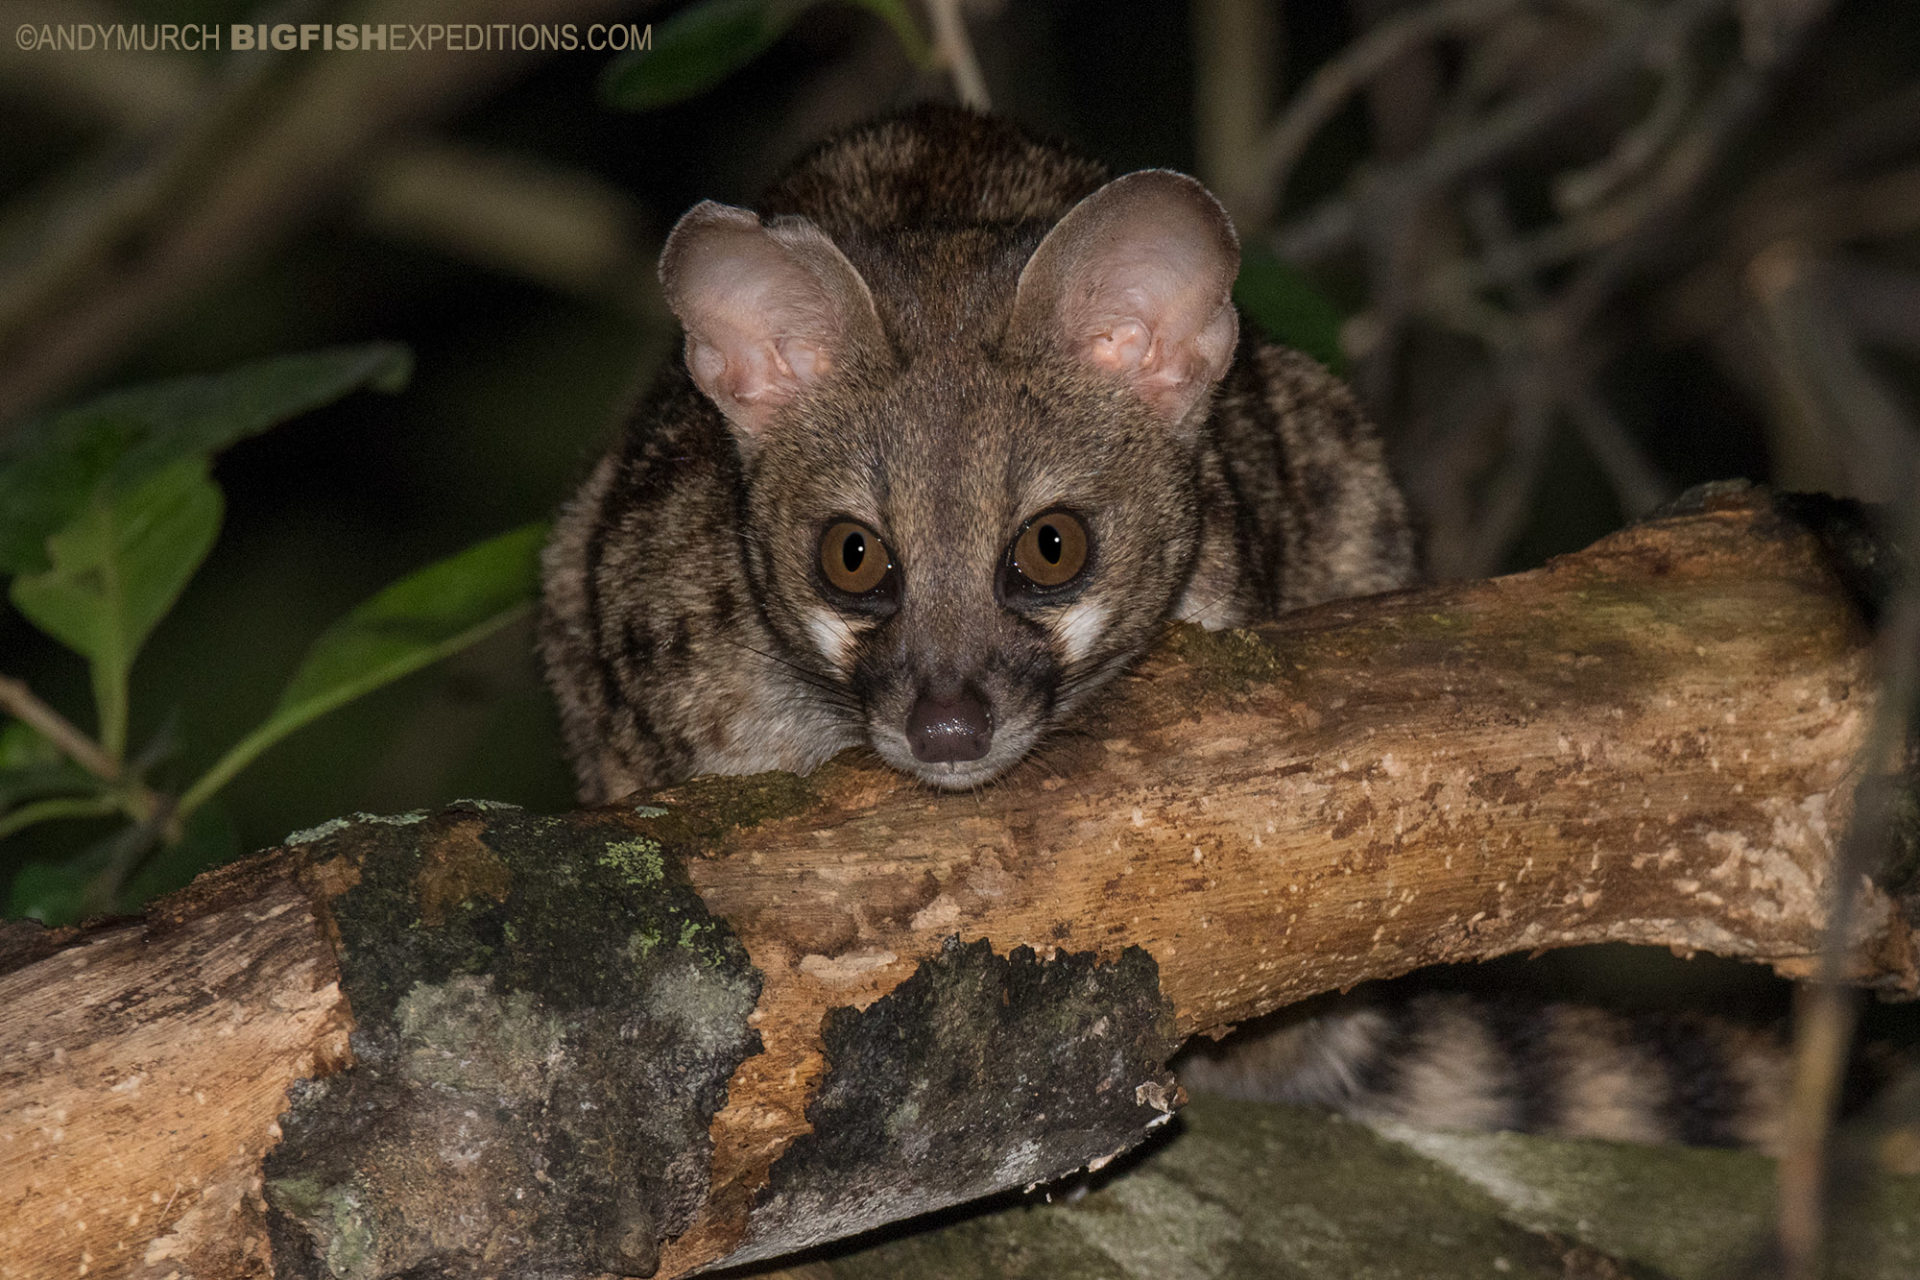
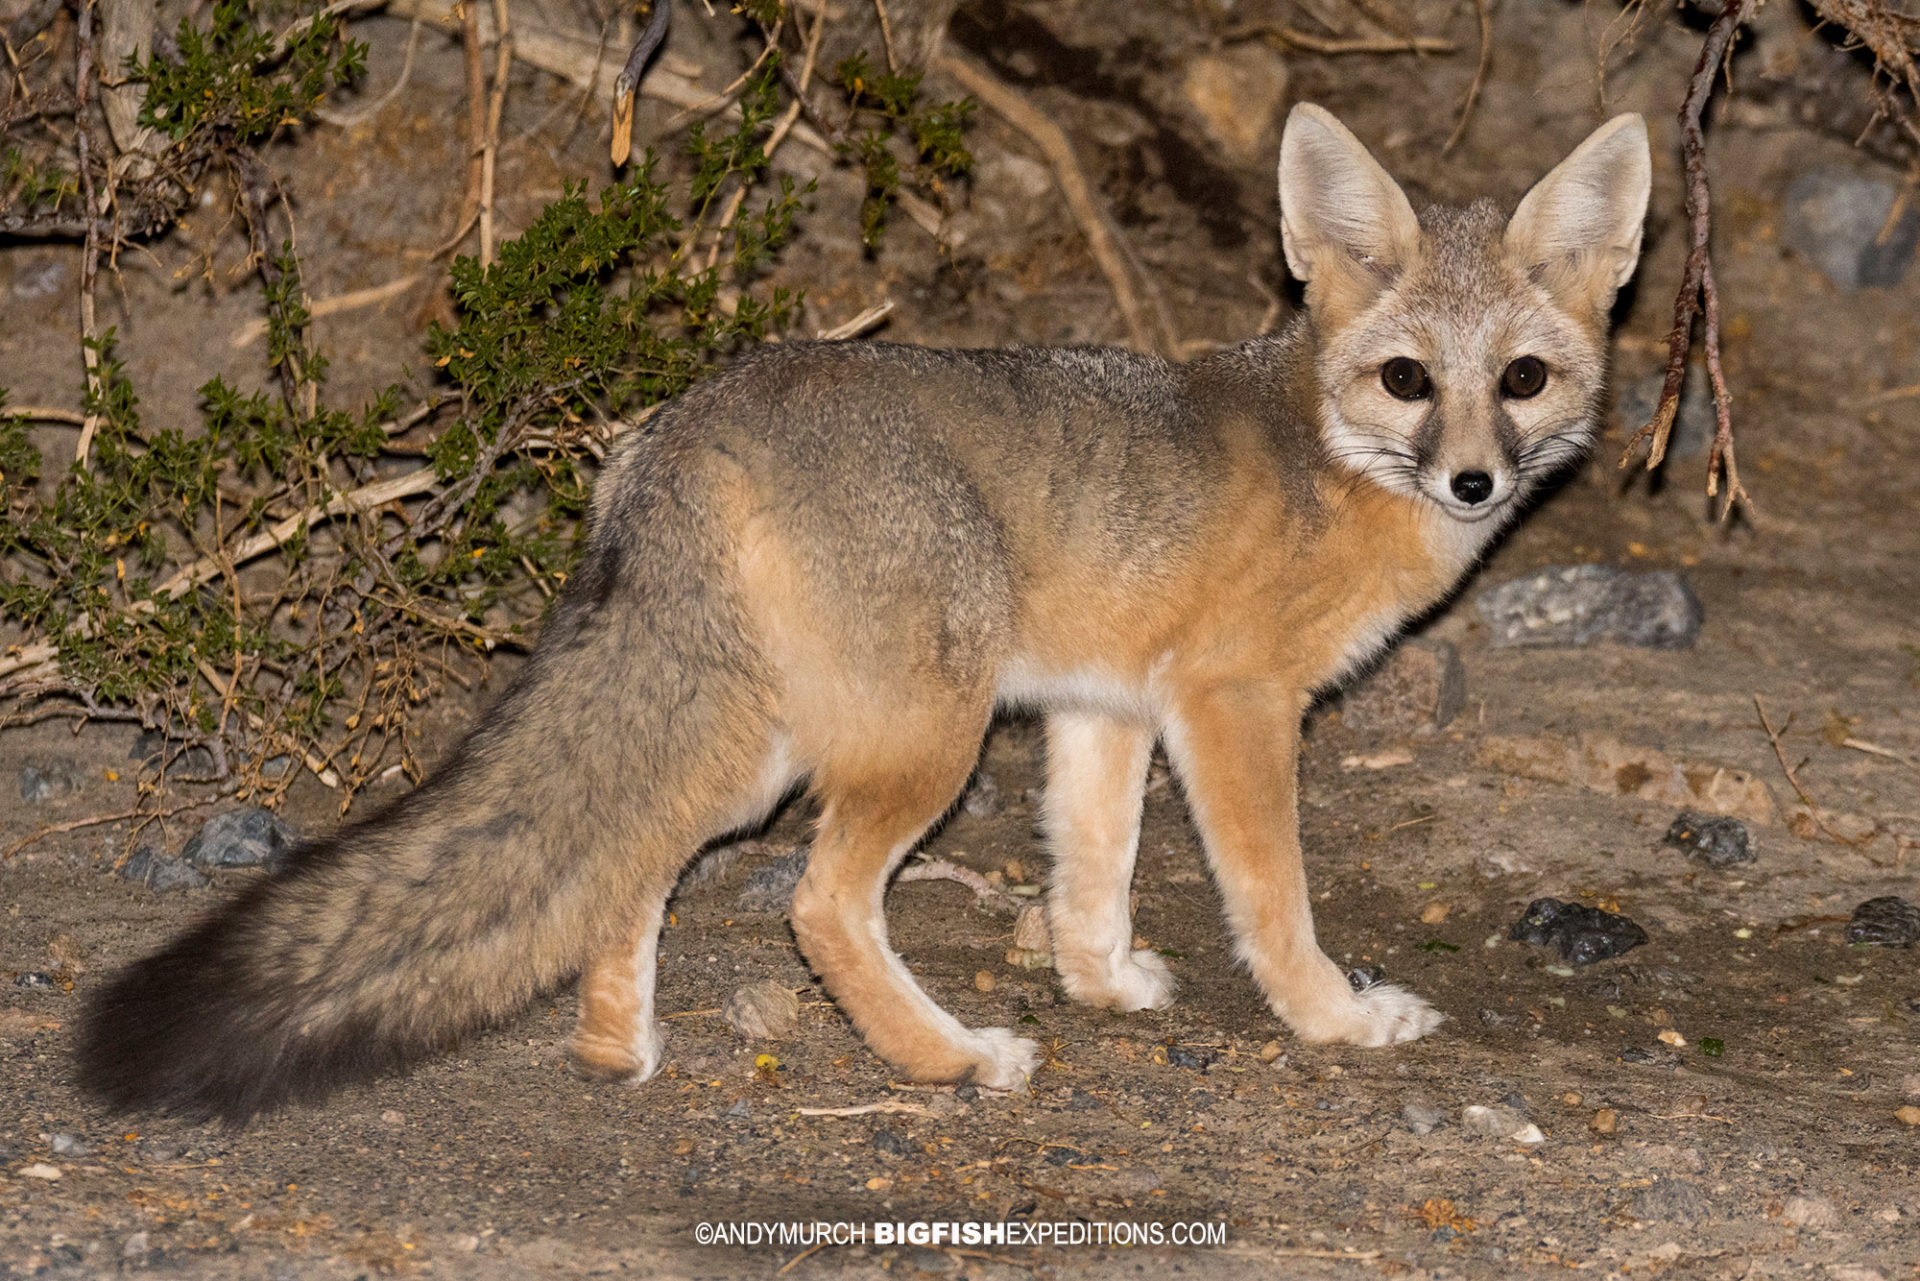
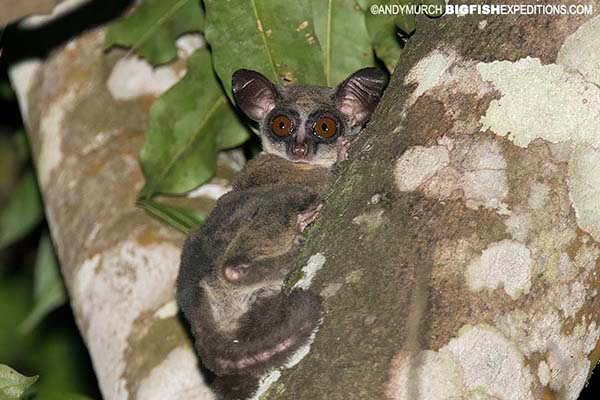
Spotlighting is an inexpensive method of finding animals that only come out at night. All you need is a powerful modeling light that can pick up on movements in the bush or the eye-shine of certain nocturnal animals. Not all animals have reflective eyes but most nocturnal mammals do.
The most effective method is to have multiple people spotlighting at the same time. More eyes on the terrain equals more chances to spot animals. More importantly, it means that non-photographers can continue to track an animal while you ready your camera, but of course, it is important to be ready anyway because nocturnal animals tend to be shy and reclusive so they often melt back into the undergrowth as soon as they realize they have been discovered.
Even if you are out on your own, having a couple of spotlights is helpful so that you can mount one on your camera that always points in the direction your camera is pointing, and another that you can point quickly in all directions. If you just have a light attached to your camera, you will have to rotate your heavy telephoto lens and SLR constantly. Unless you’re extremely strong, or you have a very light camera, your arms with get tired very quickly.
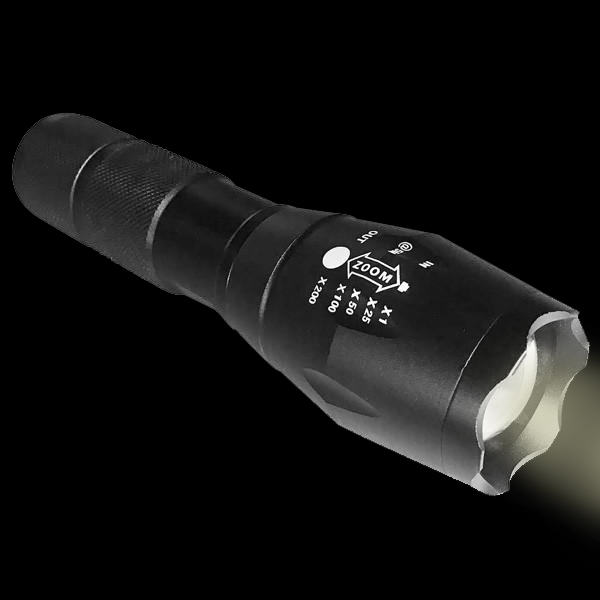
CHOOSING A GOOD SPOTLIGHT
There are two important factors to consider when buying a spotlight: power and beam width.
Regarding power, it’s all about the lumens. There are endless flashlights available on the internet that boast thousands of lumens of power but I have found that most companies tend to exaggerate the output of their lights. Read some reviews before you make a purchase. I recommend that you choose a flashlight that has an output of at least 3000 lumens.
A narrow beam is also important. Even if your flashlight is bright, if the beam is not concentrated in one direction, it won’t reach very far into the night. Remember, its not just about finding the subject. You need enough intensity for your telephoto lens to find focus on a dark furry animal that is probably obscured by branches or tall grass.
Some flashlights have a variable beam. In other words, you can rotate or telescope the front element slightly to make the beam really narrow. I like this feature because once you’ve found your subject, you can narrow the beam for maximum intensity in one small area. This will allow you to autofocus in that small area from a great distance.
One really annoying feature of many cheaper flashlights is the different modes that they have. Beware of ‘tactical lights’. These usually have five settings: full power, medium power, low power, slow S-O-S mode and fast S-O-S mode. The problem with these is that they switch to the next mode each time you turn them on. So if you were on full power last time you switched it on, this time you’ll be on medium power and you’ll have to scroll through all the different settings to get back to full power. That is a slow process that may result in you missing the shot.
You will likely have your flashlight on full power for a long time so avoid lights with built in rechargeable batteries that force you to plug the light in once it dies. User replaceable rechargeable batteries are the way to go. And, shame on you if you use old-fashioned disposable alkaline batteries. They poison the planet.
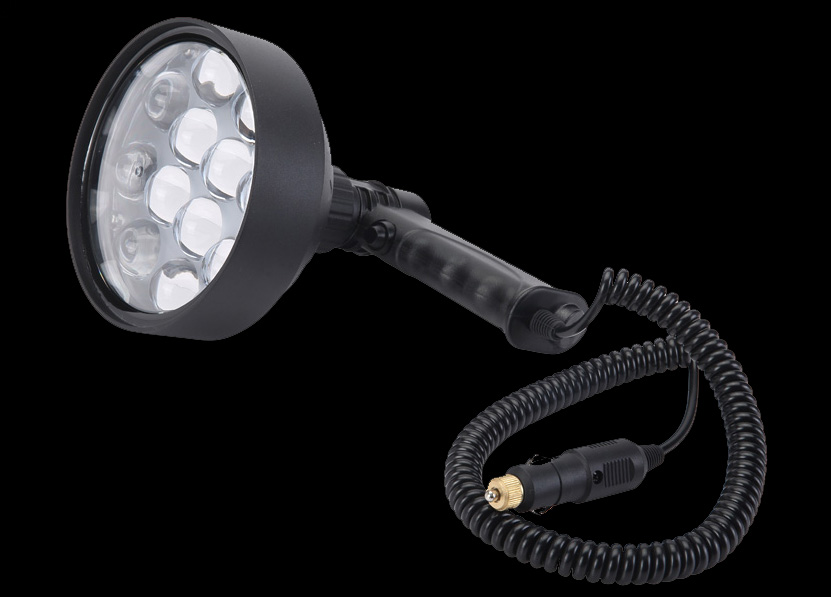
HAND HELD FLOODLIGHTS
There are also powerful hand held floodlight that plug into the cigarette lighter of your vehicle. The obvious benefits being that they illuminate a large area and they never run out of juice. Floodlights are fairly inexpensive and some pack a serious punch. Beware that the bulbs can get very warm and they are quite fragile when they’re hot.
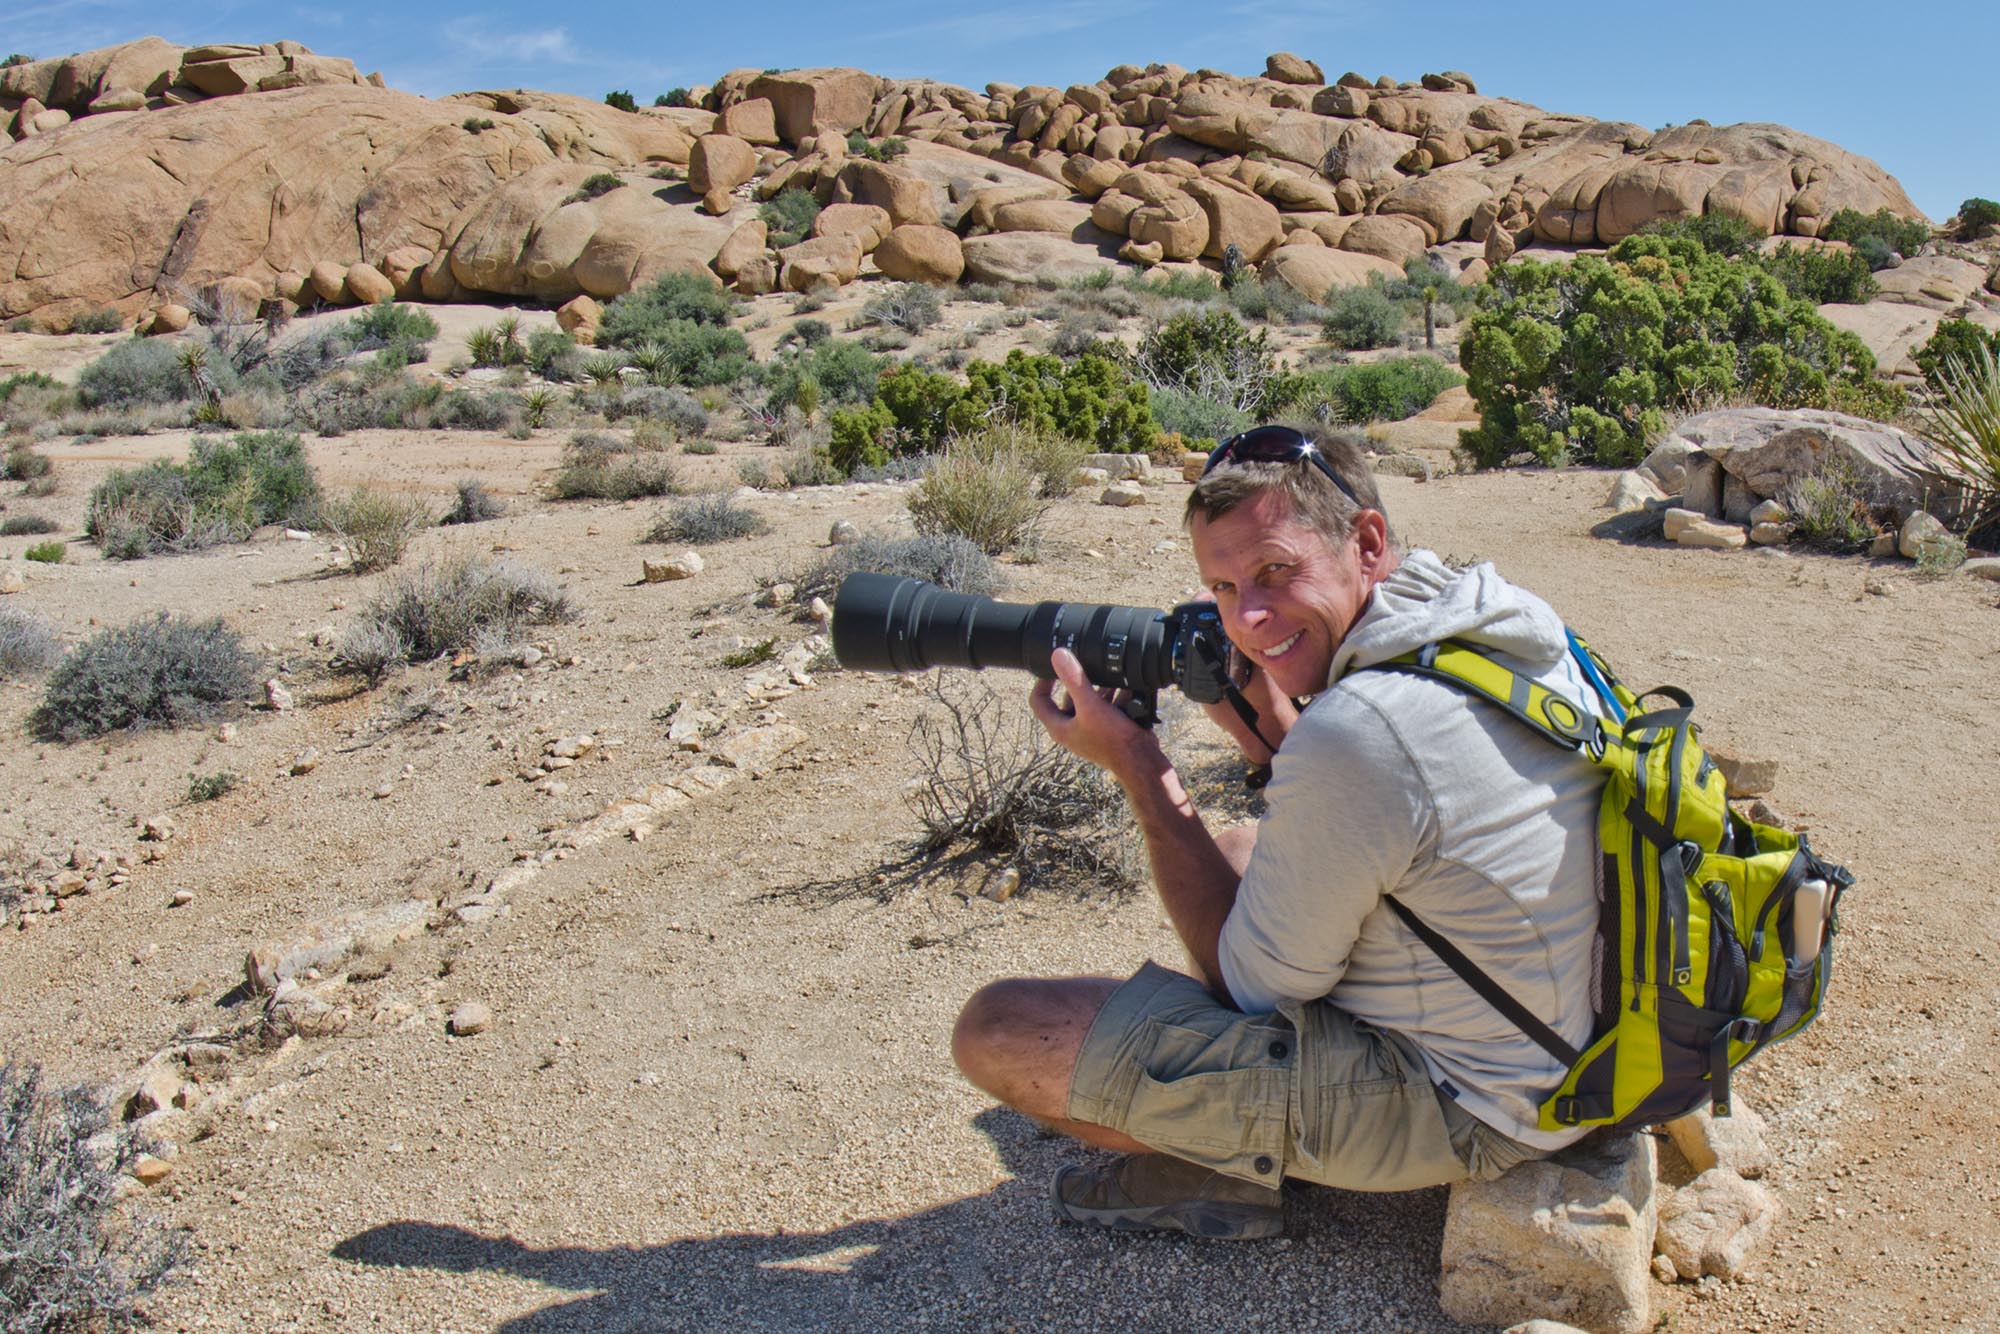
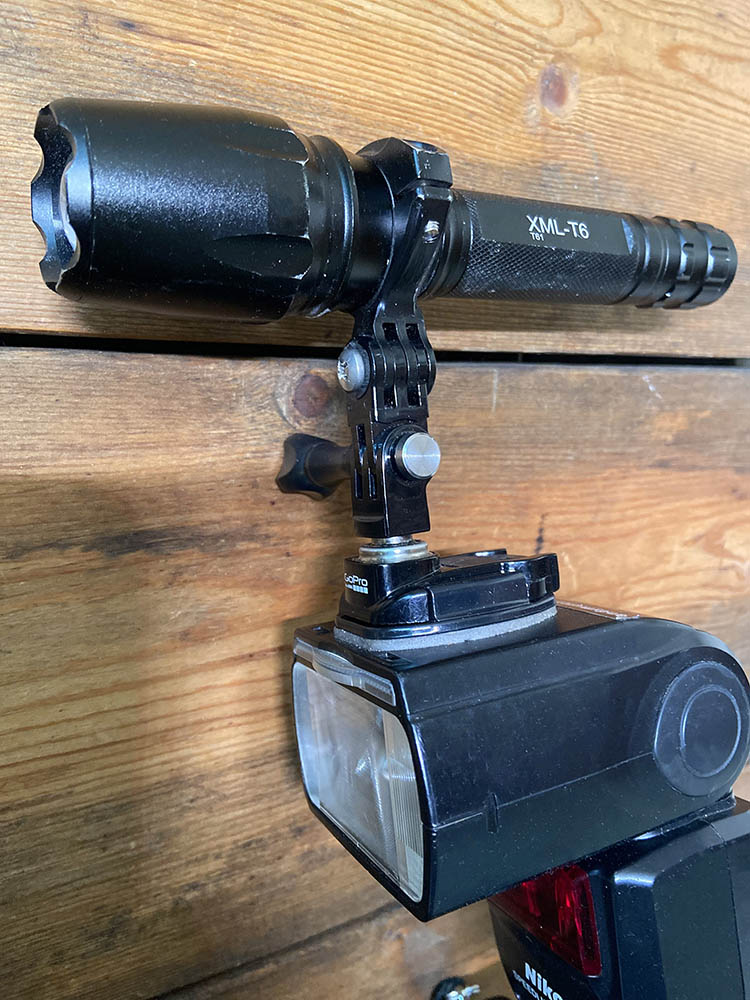
ATTACHING A MODELLING LIGHT TO YOUR CAMERA
Once you’ve found your quarry, it is imperative to have a bright light pointing in the same direction as your camera so that you can autofocus. There is nothing more frustrating than watching an animal through your viewfinder while your lens hunts in-and-out in low light. Unless you can hold a heavy camera with one hand and are ambidextrous enough to shine the light in exactly the same direction with the other, the best solution is to mount the light directly to your camera.
One option is to attach a camera tray with a bracket that the light can fit on. You may find these available for sale but they are fairly easy to build if you have some basic tools and materials. A simpler option is to tape a flashlight on top of your strobe using electrical tape.
Personally, I a use GoPro swivel mounts attached to my external flash unit with a GoPro sticky mount. I then bolt a GoPro pipe clamp around the flashlight and clamp them together. All components can be purchased on Amazon or Ebay. The advantage of this system is, I can quickly unclip the whole thing from the external flash. And the swivel is great for adjusting the angle of the modelling light beam.
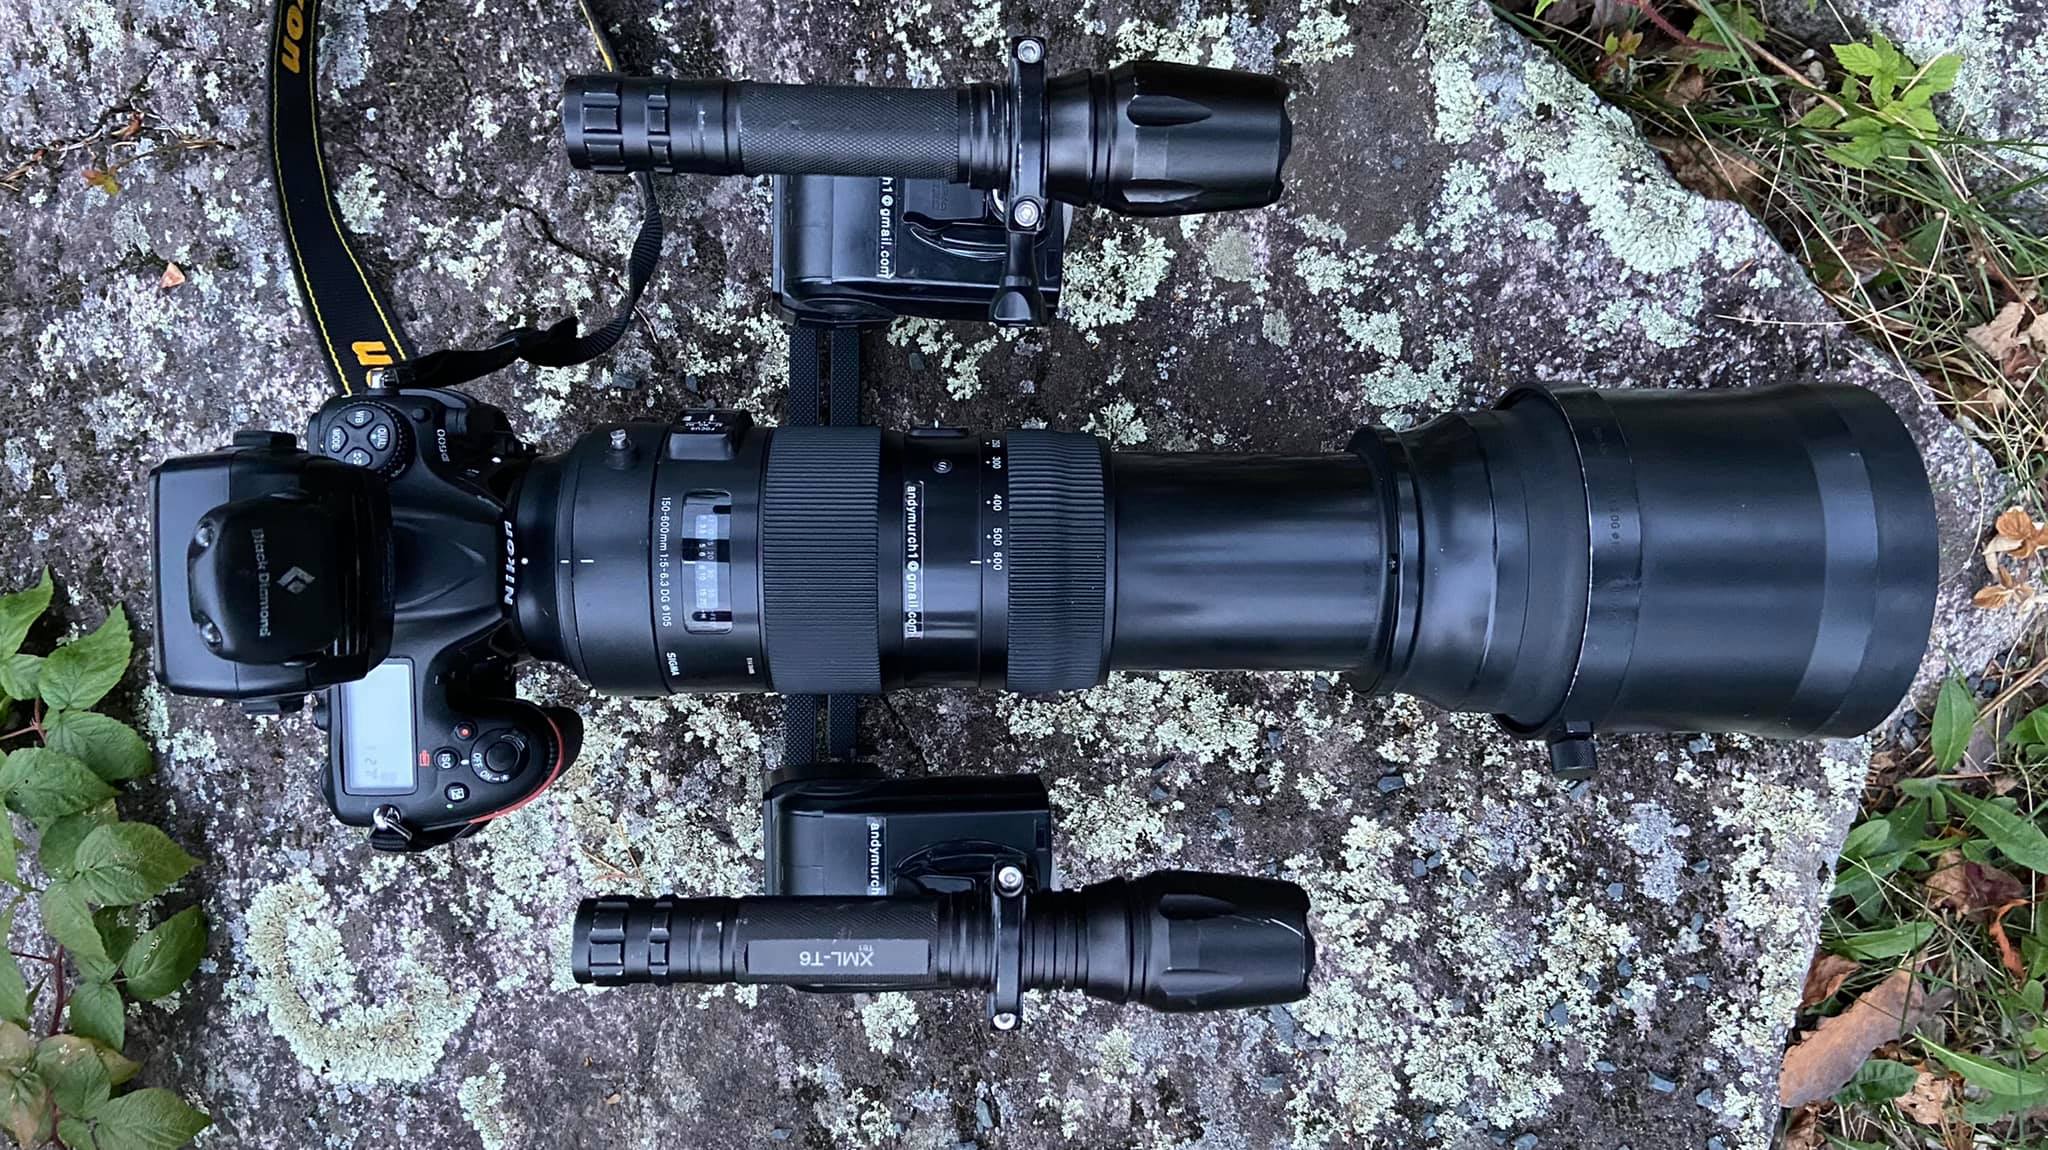
If you want even shadows, you can also use a crossbar mounted under your lens or camera to mount twin strobes and modelling lights, but combined with a telephoto lens, a rig like the one below is extremely heavy!
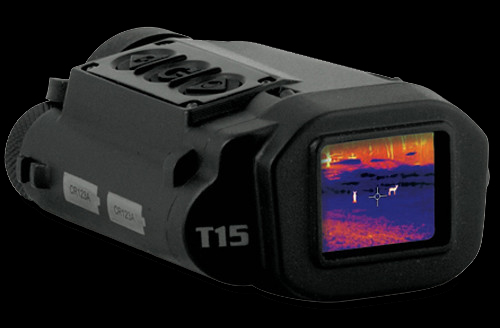
USING A THERMAL IMAGING SCOPE TO FIND NOCTURNAL ANIMALS
Another great way to find animals in the dark is to use a thermal imager. Thermal scopes do not actually show a detailed picture of the animal. Rather, they help you identify hotspots in the bush. Animals that radiate body heat show up as bright blobs.
Depending on the model and setting, warm spots may look orange against a blue or green background. Even tiny rodents will be visible in the dark, but cold blooded reptiles and amphibians will not show up at all.
Imagers are best used in combination with a traditional spotlight. First find a potential subject with the imager and then switch to a spotlight to figure out what exactly you are looking at.
Thermal scopes can work very well even if the animal is partially obscured by branches and leaves. The problem is, it is difficult to tell distance so you may be looking at an elephant 100m away or you could be looking at a bird sleeping on a branch much closer.
Another drawback is that looking through a brightly lit scope (even on its lowest setting) will render the user night blind for a few minutes. So you may want to assign one person as the ‘designated scoper’ to point out animals that you and other shooters can then train your modelling lights on.
Some units can be linked to a smart phone screen. Then, everyone can see the image and no one gets temporarily blinded.
Good thermal imagers are quite expensive. For a unit that works well, expect to pay a minimum of $2000.
As you are not taking pictures with the scope, resolution and colour options are not critical. More important is the angle of coverage. The wider the angle, the more chance you have of locating something interesting on a single sweep.
SETTING UP YOUR CAMERA AND CHOOSING THE RIGHT FLASH UNIT
Not all flash guns are created equal. Each SLR manufacturer offers a range of options to suit every budget and need. At the time of writing, Nikon’s most powerful flash is the SB5000; a model with a very powerful discharge and a fast recycle time. Canon’s latest, greatest is the 600EX.
Whichever unit you choose (be it proprietary or a third party company), I guarantee that you will wish your flash was vastly more powerful than it is, even if you’re using the most powerful option available.
Most flash units (aka speed lights) work well when lighting a relatively close subject but over distance, their efficacy falls off quickly. To maximize your chances of adequately lighting your subject, use a high ISO and a wide aperture. You want to let the most light in that you can. Shutter speed is not so important because the flash fires in a few milliseconds so the shutter speed won’t make much difference. But, keep it fast enough to shoot your subject without any camera shake.
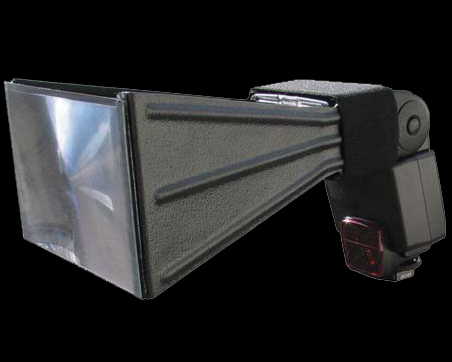
Some shooters that are looking for a little more reach, use a Better Beamer Flash Extender (BBFE). This is a strange looking contraption that fits on the front of the flash unit to focus the beam. By doing so, more light is thrown in one direction. The front clear plastic lens on the BBFE has circular grooves that redirect light beams; rather like a fresnel lens in a lighthouse. Personally, I haven’t found that the BBFE makes much difference but some shooters are big fans. If you’re struggling to throw enough light at your subject, I suggest you give this device a try.
REMOVING EYE SHINE
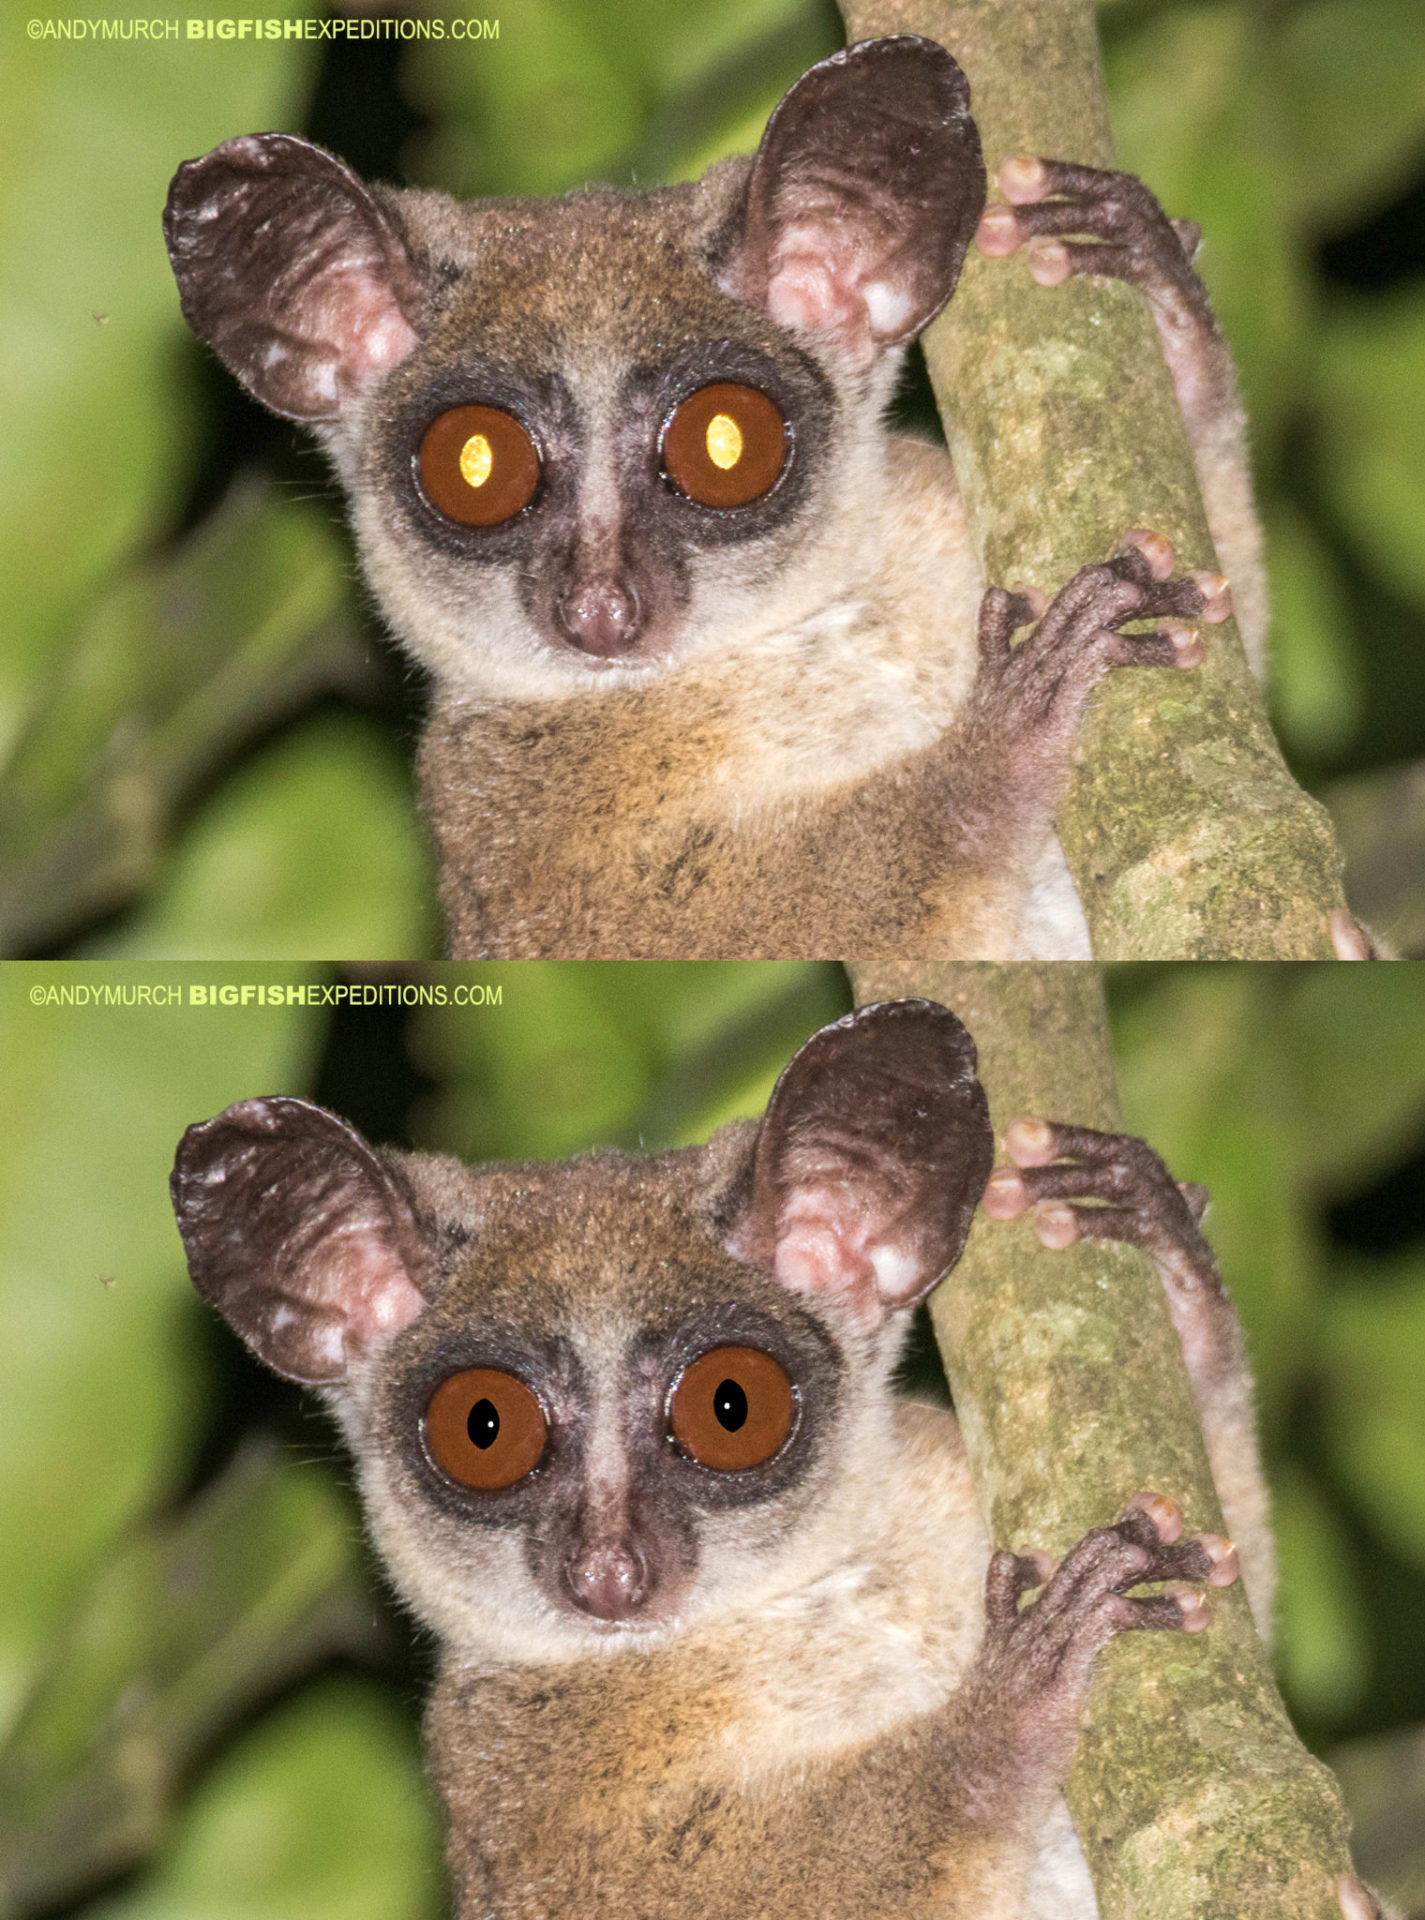
Many nocturnal mammals have extremely reflective eyes. Eye shine is a great way to find animals at night but when photographed, that same eye shine can be distracting and make the image look less natural. Once you’ve found and successfully photographed your nocturnal subject, you have a choice of leaving the eye shine visible or using image manipulation tools like those included in Photoshop to remove the eye shine so that the animal’s pupils appear black.
Photoshop has a function called Pet Eye Removal. Find the Red Eye Removal tool within the initial Camera Raw tool suite. Then, select the alternative ‘Pet Eye Removal’ tool. This is a quick and easy fix but it only approximates the pupil position and size, so the results may not look particularly good.
For better results, open the image in the main Photoshop suite, select a black paint brush at 100% opacity and flow and paint the offendingly bright pupil black. Be careful not to leave any bright edges on the iris because this will look fake.
Once you have painted the animal’s pupils black, remember to add a small bright catchlight in the same position in each eye. Without it, the animal’s eyes will look lifeless. To add a catchlight, choose a small, round, white brush and simply touch each pupil somewhere near the center. You can add multiple catchlights but a single one usually looks best.
When done correctly, a little post production eye shine manipulation will make a big difference to the finished image.
ABOUT THE AUTHOR
Andy Murch is a fanatical big animal photographer. His images and shark stories have appeared in hundreds of books and magazines around the world from titles as varied as Canadian Geographic, Scuba Diving, Ocean Geographic, FHM, Digital Photography Magazine, National Geographic, and the Journal of Zoology.
You can find a broad selection of Andy’s wildlife images on AnimalImages.net
Andy is also the creator of the ever expanding Shark and Ray Field Guide on sharksandrays.com